> ## Documentation Index
> Fetch the complete documentation index at: https://www.recraft.ai/docs/llms.txt
> Use this file to discover all available pages before exploring further.
# How to create a mockup
Mockups allow you to place your artwork, logo, or design onto product photography, such as T-shirts, tote bags, cups, or packaging, directly within the Recraft canvas. You can either generate a mockup from scratch or convert an existing image into a mockup frame.
## Mockup collections
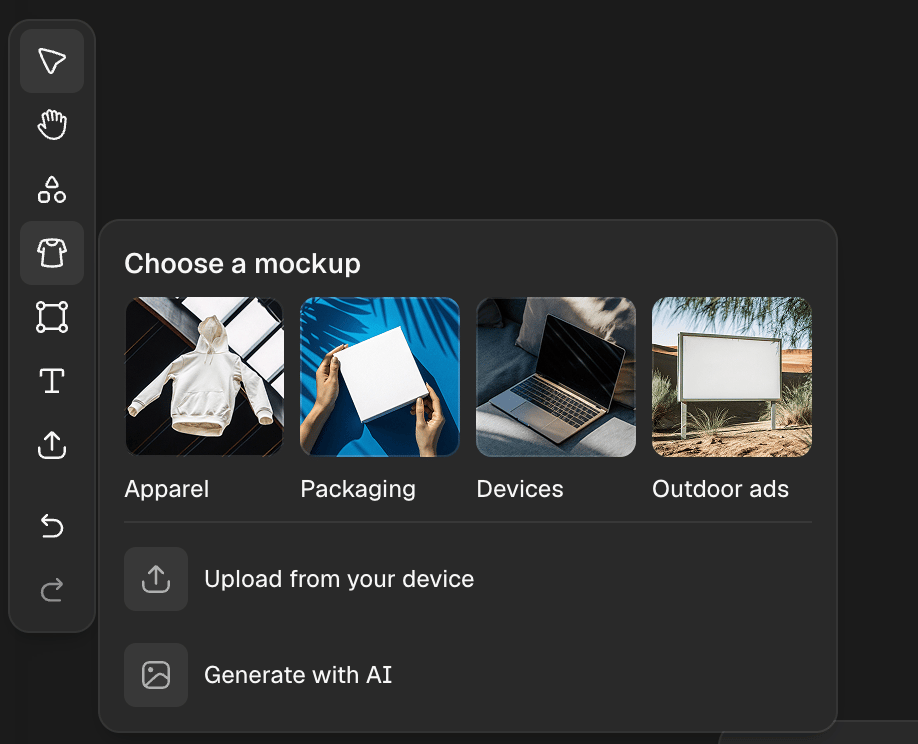
Click the **Mockup** icon in the toolbar to open the mockup panel. From there you can:
* Browse four collections of pre-made mockups: **Apparel**, **Packaging**, **Devices**, and **Outdoor ads**
* Upload a mockup from your computer
* Generate a mockup from scratch
The same four collections are also accessible via the **Get started** window. Select any ready-made mockup from a collection to add it directly to the canvas.
#### There are three ways to create a mockup:
#### 1. Use a pre-made mockup from a collection
1. Click the **Mockup** icon in the toolbar to open the panel.
2. Browse the collections and select a mockup to add to the canvas.
3. Apply your design following the steps in [Applying your design to the mockup](https://www.recraft.ai/docs/recraft-studio/mockups/applying-your-design-to-a-mockup).
 #### 2. Generate a mockup from scratch
Use this option if you want to start from a prompt:
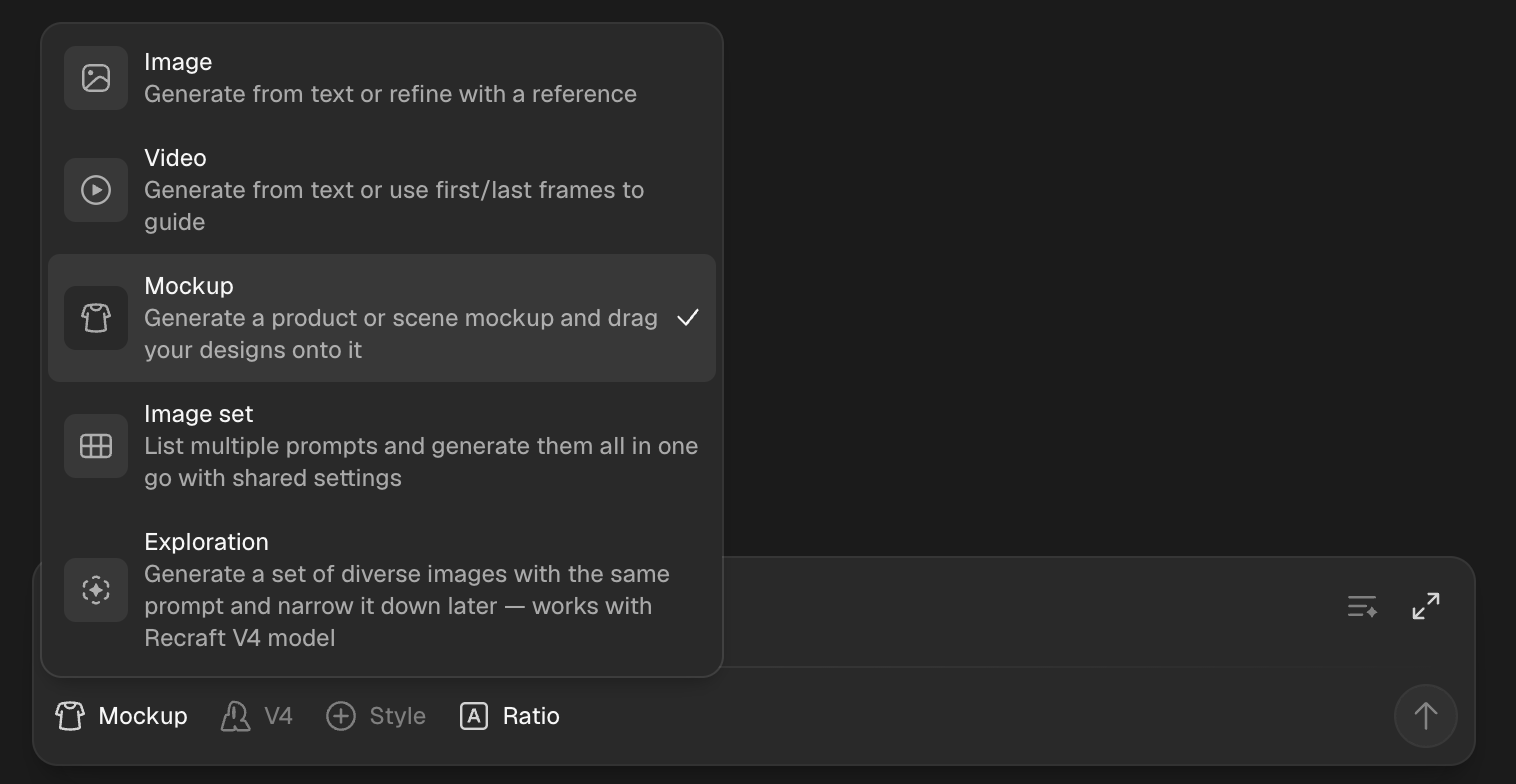
1. Open the prompt panel and select **Mockup** as the generation type (where you switch between Image / Video / etc.).
2. Write a prompt describing the product you want to visualize (e.g., "white T-shirt facing forward").
3. Press **Enter** or click the **up arrow** to generate a mockup-ready image.
Once generated, the image is automatically converted into a mockup frame.
#### 2. Generate a mockup from scratch
Use this option if you want to start from a prompt:
1. Open the prompt panel and select **Mockup** as the generation type (where you switch between Image / Video / etc.).
2. Write a prompt describing the product you want to visualize (e.g., "white T-shirt facing forward").
3. Press **Enter** or click the **up arrow** to generate a mockup-ready image.
Once generated, the image is automatically converted into a mockup frame.
 #### 3. Convert an existing image to a mockup
You can also convert any photorealistic image (e.g., a stock photo of a product) into a mockup:
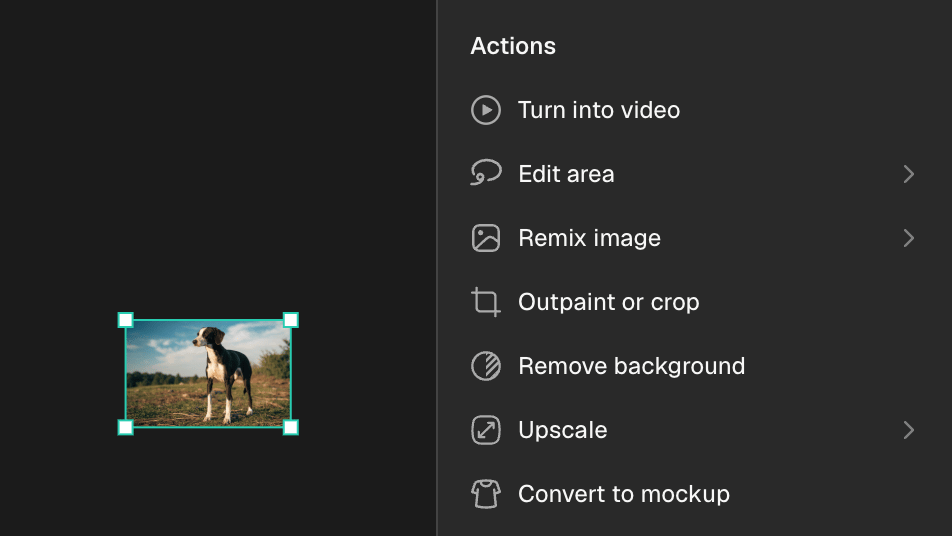
1. Place the image onto the canvas.
2. Select the image and in the right panel, click **Convert to mockup**.
3. The image will be converted into a mockup frame.
#### 3. Convert an existing image to a mockup
You can also convert any photorealistic image (e.g., a stock photo of a product) into a mockup:
1. Place the image onto the canvas.
2. Select the image and in the right panel, click **Convert to mockup**.
3. The image will be converted into a mockup frame.
 This method works best with any suitable object in an image, such as T-shirts, cups, packaging, notebooks, etc. You can also generate a product photo in a photorealistic style and convert it the same way.
## Enhance realism
For mockups with flat surfaces — such as packaging or devices — you may want to refine how the design sits on the object, so it follows the correct perspective or fits precisely onto a screen.
Use the **Enhance realism** function to blend your design more naturally into the mockup. It uses the Nano Banana 2 model and costs **11 credits**. This step is optional — depending on the mockup, you may or may not need it.
####
This method works best with any suitable object in an image, such as T-shirts, cups, packaging, notebooks, etc. You can also generate a product photo in a photorealistic style and convert it the same way.
## Enhance realism
For mockups with flat surfaces — such as packaging or devices — you may want to refine how the design sits on the object, so it follows the correct perspective or fits precisely onto a screen.
Use the **Enhance realism** function to blend your design more naturally into the mockup. It uses the Nano Banana 2 model and costs **11 credits**. This step is optional — depending on the mockup, you may or may not need it.
####