How to Build a Brand Mascot with AI That Doesn't Fall Apart
June 26, 2026
•
min read
How to Build a Brand Mascot with AI That Doesn't Fall Apart
A good mascot shows up on a sticker, a poster, and a social post and still looks like the same character. Here is how to build one that does.
A brand mascot is not a single image. It is a character with a name, a personality, a color palette it refuses to share, and the ability to show up on a sticker, a poster, and a cereal box without having an identity crisis. Getting all of that right used to take a full character bible and a very patient illustrator.
Recraft Studio has the tools to do it faster, and more importantly, to keep it consistent. Here is how to build a mascot that holds together from the first concept sketch to the fifth format.
Step 1: Write the brief
Every mascot starts as a description, not an image. Before you open Recraft Studio, you need four things written down: a name, a personality, a world the character lives in, and a color palette it refuses to share with anyone else. These are not optional extras. They are what separates a character from a generated creature.
Think of it as a creative brief for someone who does not exist yet. Name: what do people call it? Personality: what is it like at a dinner party? World: what does the environment it belongs to look, feel, and smell like? Color palette: the three to five colors that are its and only its. If you cannot answer those four questions before you prompt, you are not building a mascot. You are generating vibes and hoping for the best.
The more specific the brief, the more useful every generated image becomes, because you have something real to judge it against. A brief that says "cool character, kind of edgy" will produce exactly that: something cool, kind of edgy, and completely forgettable by next Tuesday.
Write the brief first. The prompt comes second.
Step 2: Find the character
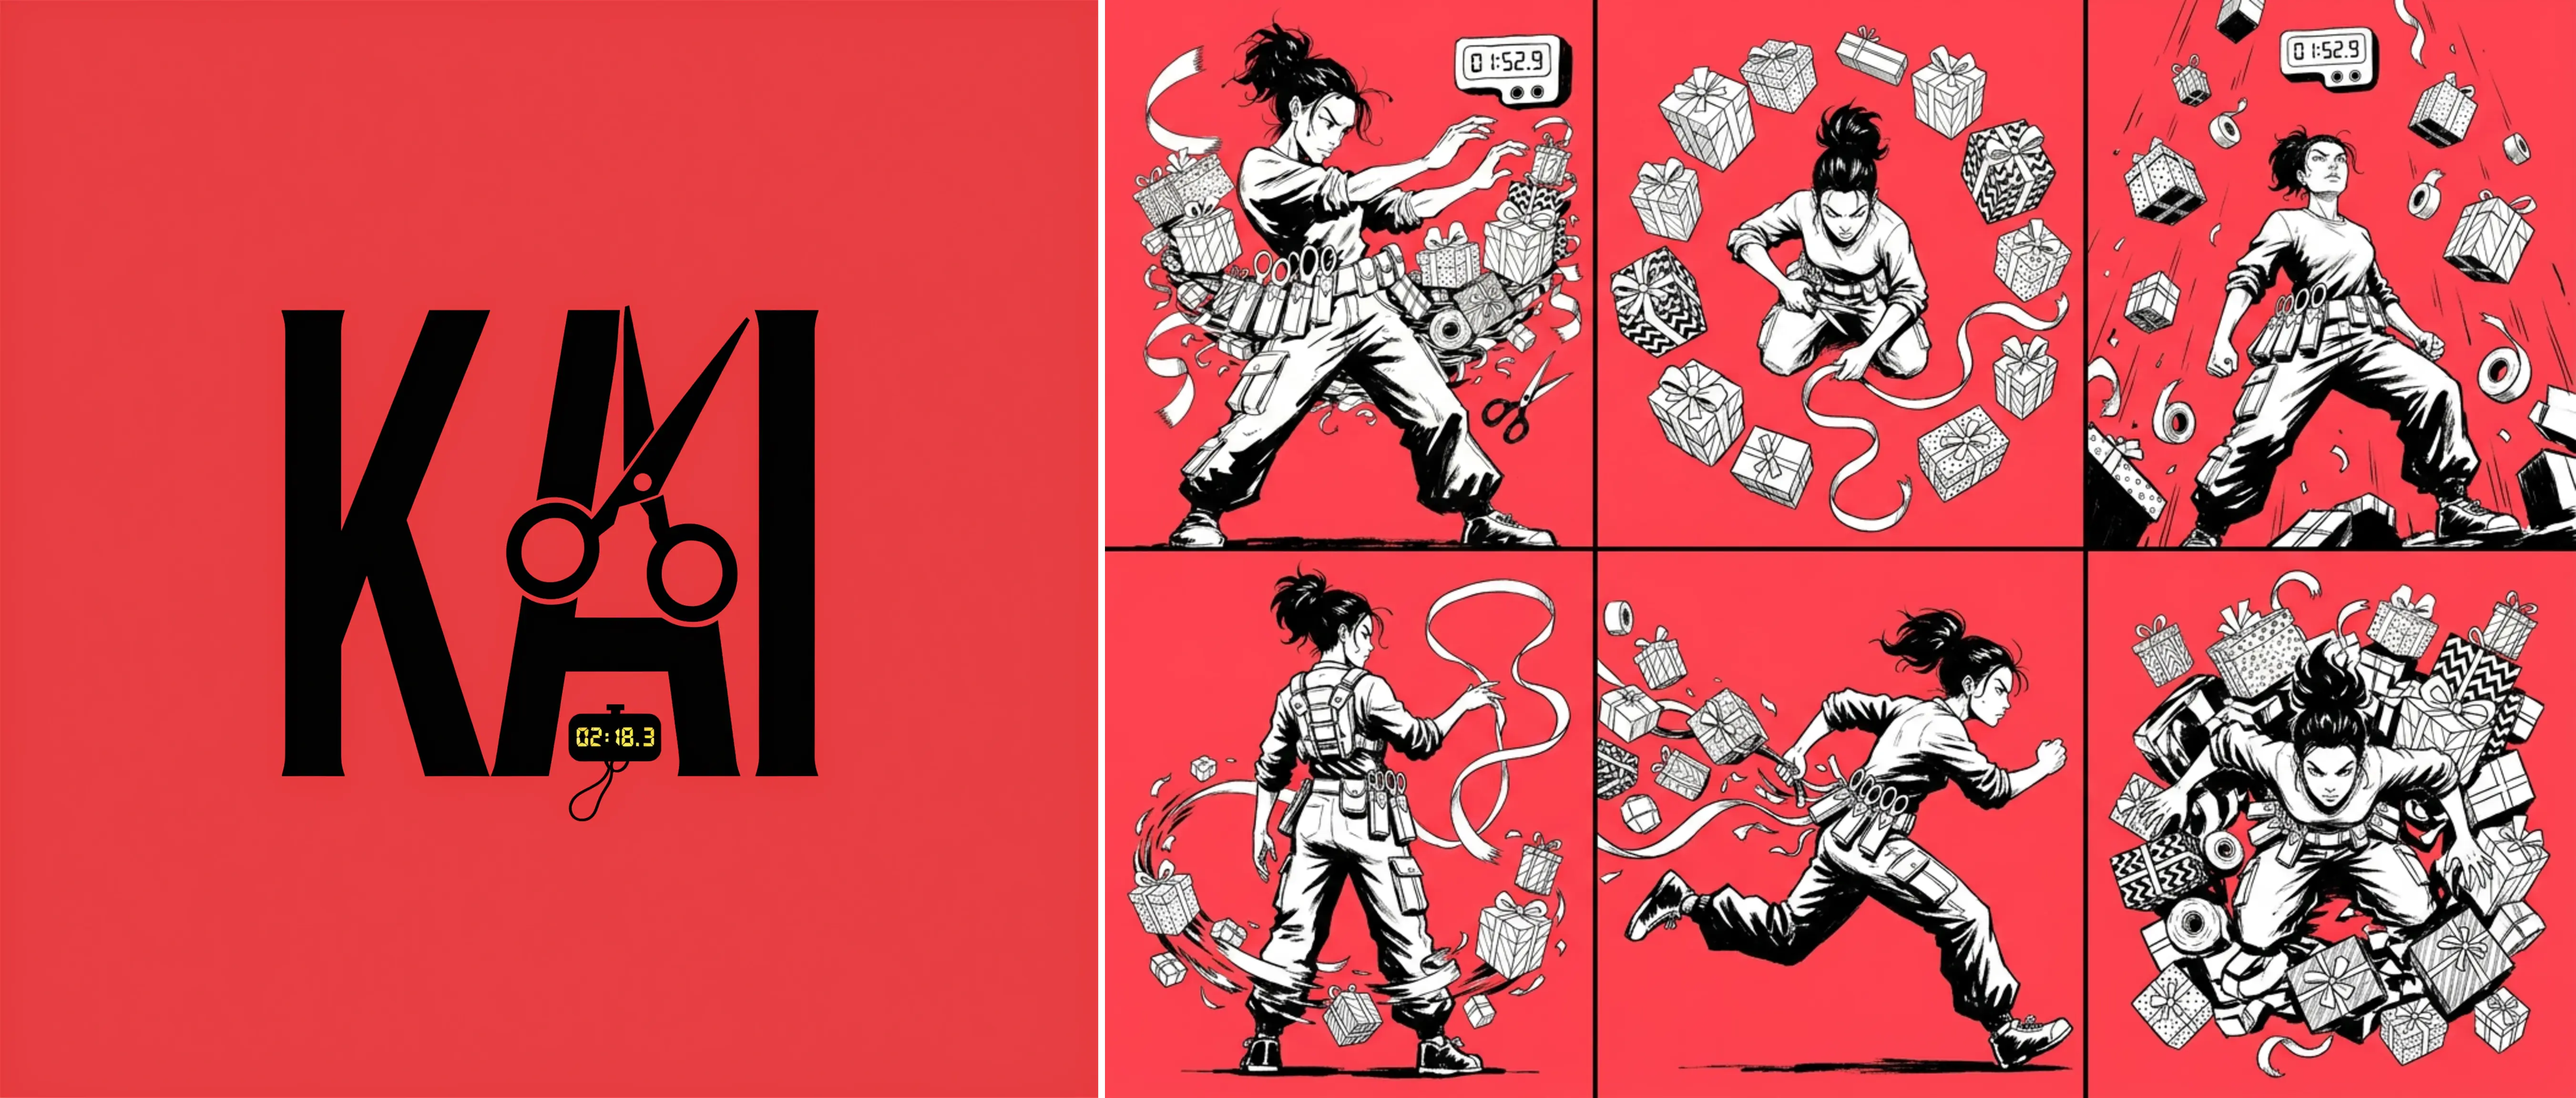
This is where Recraft Studio earns its place in the workflow. Open Exploration Mode, type a minimal prompt, and generate eight visual directions at once. The prompt does not need to be long. "Martial arts mascot, graphic, high-contrast" is enough. Recraft does not need a novel. It needs a direction.
Meet Kai. By the time you are looking at a grid like this, the hard work of Exploration Mode is already done. The visual language is locked: the graphic contrast, the red and black world, the lettering that belongs on a vintage arcade cabinet. What you are seeing is what happens after you find the direction and start building the character out. Kai is not the search. Kai is the answer.
Once you find your direction, select it and start refining from there. Five similarity levels control how closely new generations follow your chosen image, from a loose creative push that keeps only a hint of the original, all the way to near-duplicate variations for final micro-adjustments. Think of it as a dial between "inspired by" and "almost identical," with three stops in between.
You are not rewriting the prompt from scratch and hoping for a different result. You are reacting to something real and moving it closer to the brief, which is how creative work actually happens and has always happened, long before anyone was typing instructions at a machine.
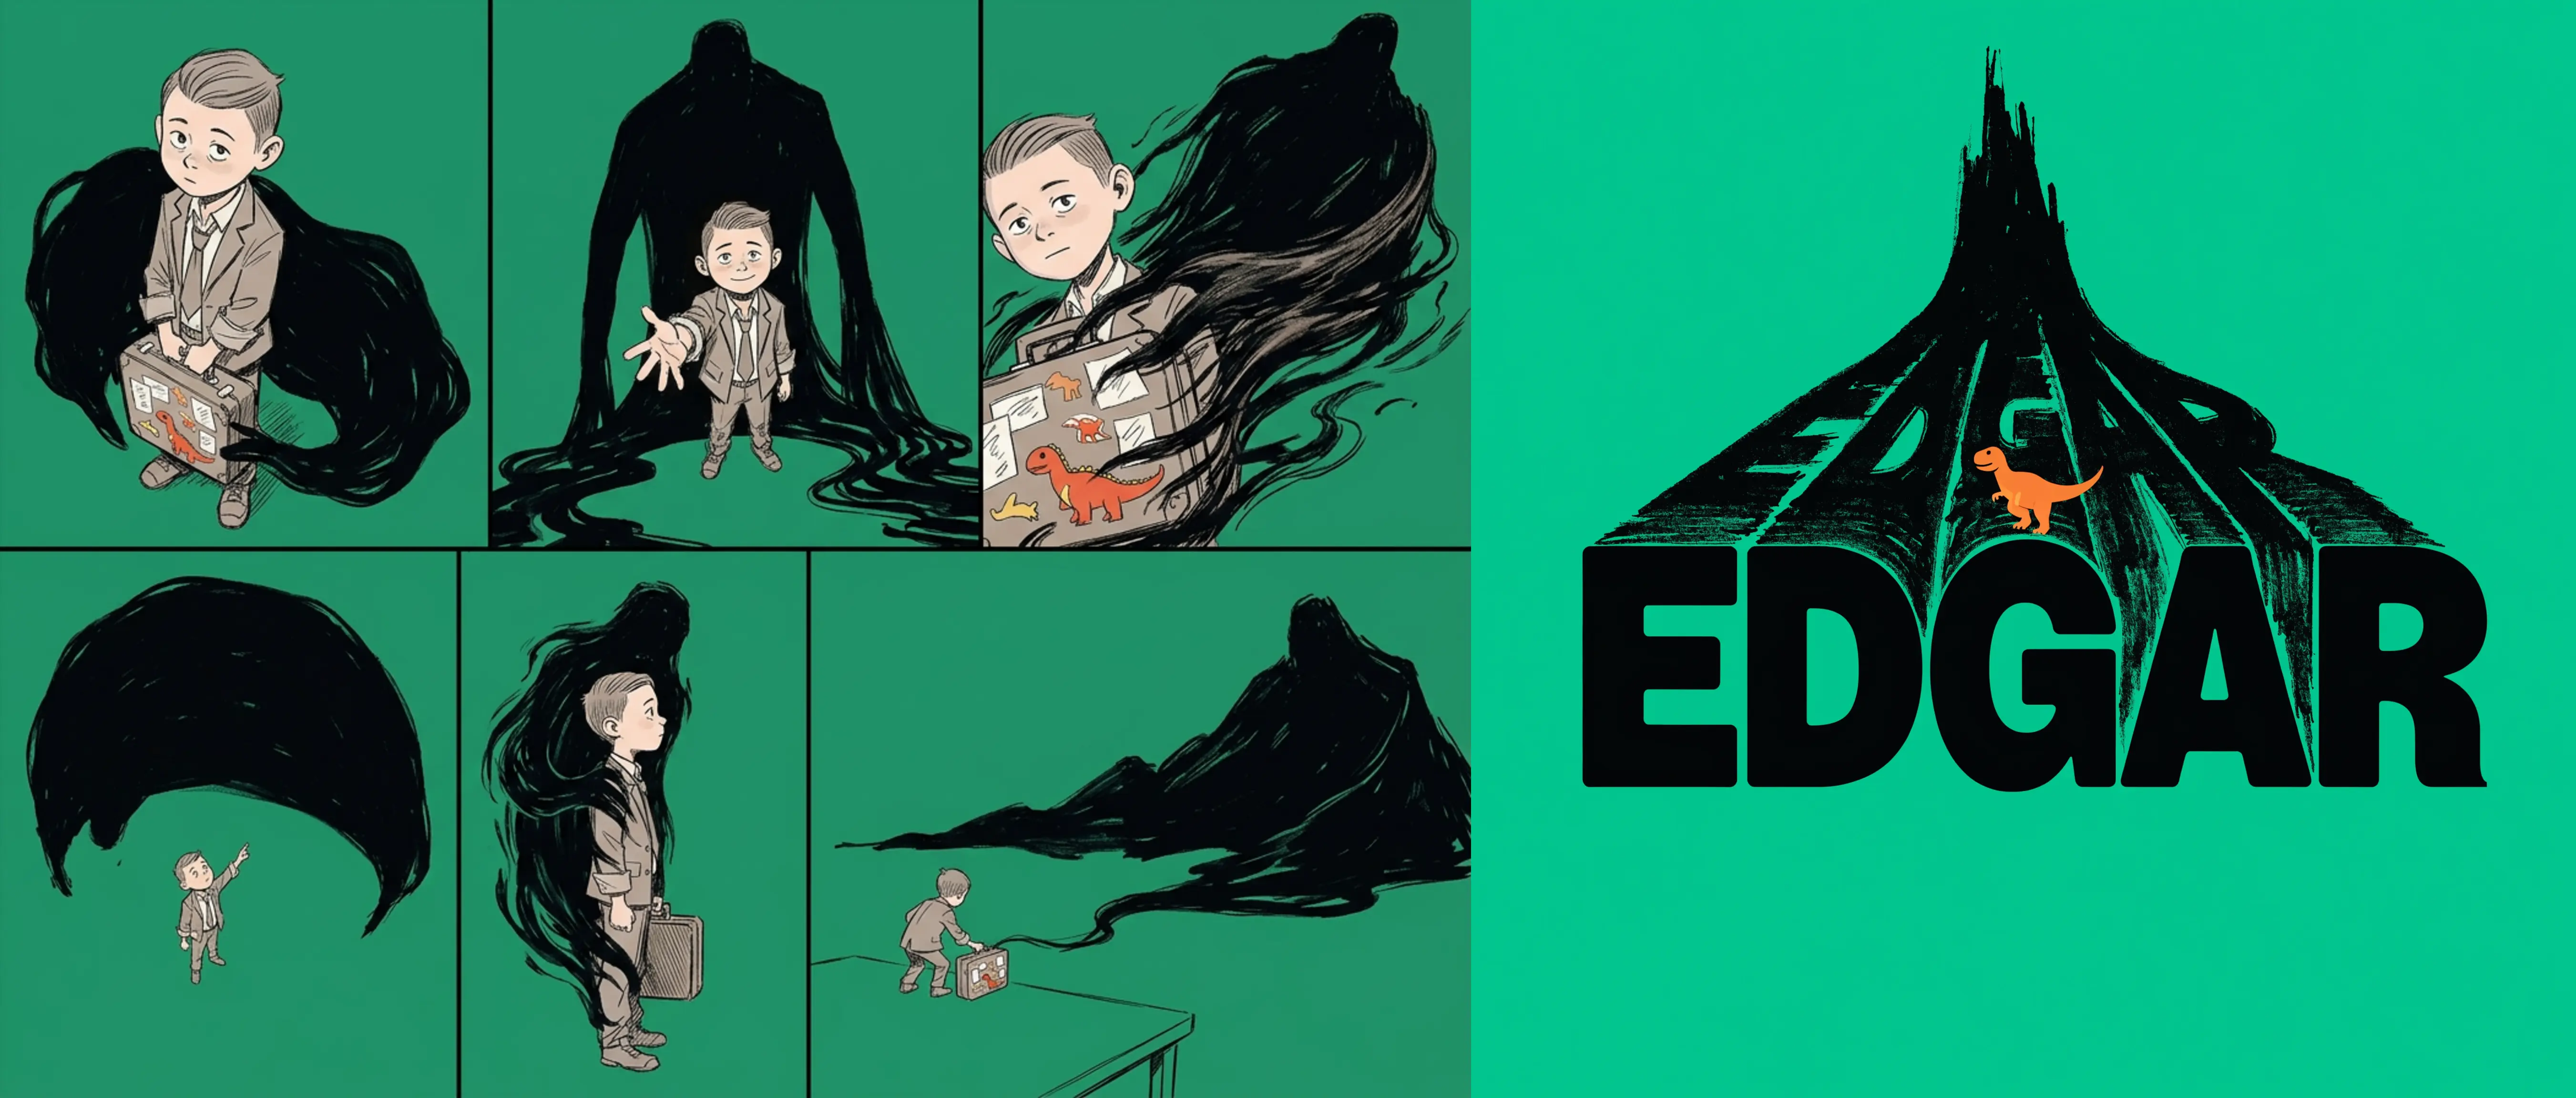
Step 3: Build the reference sheet
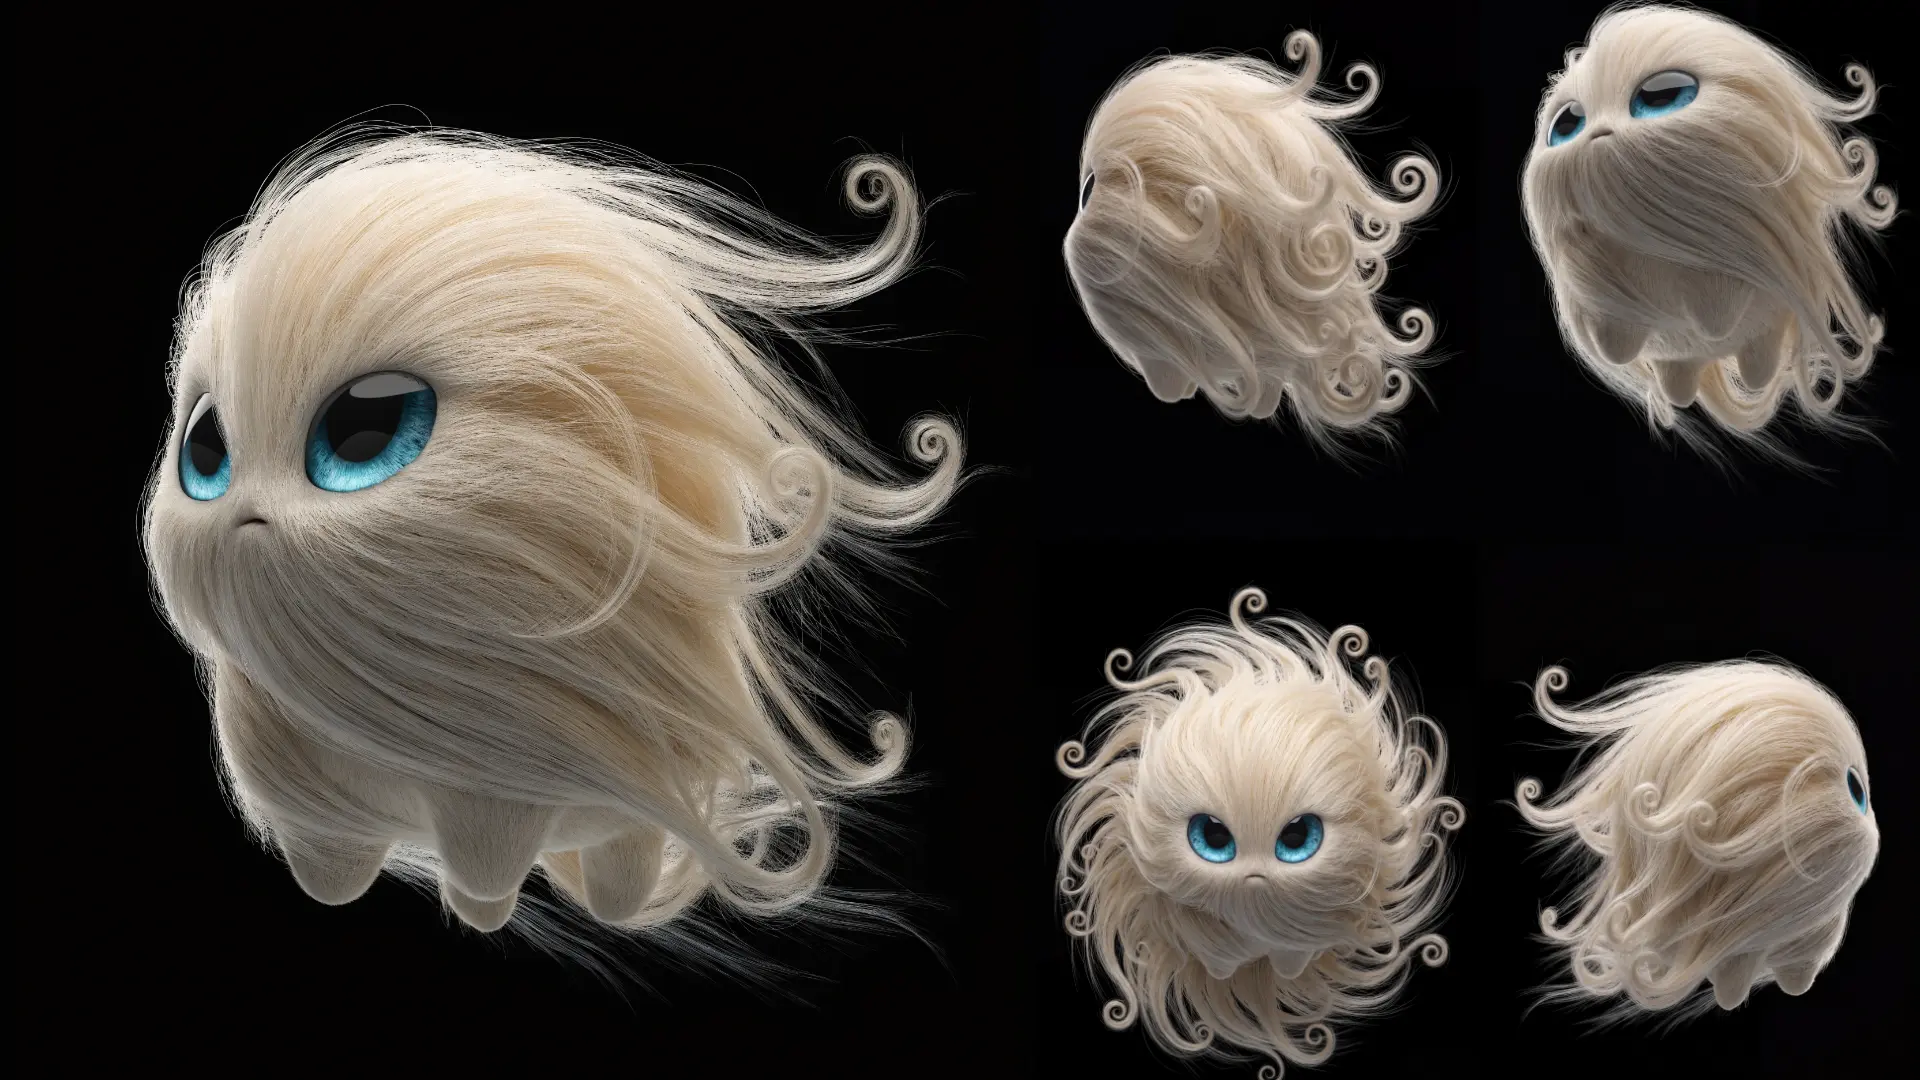
A character that only exists in one pose is not a character. It is a headshot. The reference sheet is what turns a single strong image into something a model can stay consistent with across every format that comes after it.
In Recraft Studio, Recraft V4.1 generates a proper character reference sheet: front view, profile, 3/4, back, expressions, and color swatches. Everything a character needs to travel. Everything an illustrator would have spent three billable hours producing. You get it in under a minute, which leaves plenty of time to have opinions about whether the ears are right.
For the name-logo, switch to V4.1 Vector. The Vector model is built specifically for custom wordmarks, stylized lettering, and clean exportable SVGs. The output opens in Figma without manual conversion, without stray anchor points, and without the particular kind of frustration that comes from spending forty minutes cleaning up a path that should have been clean to begin with.
The reference sheet and the name-logo together are your character's passport. Every application you build in the steps that follow checks back against these two things. If it looks like it belongs to the same world, you are on track. If it does not, you know exactly what to fix it against.
Step 4: Apply across formats
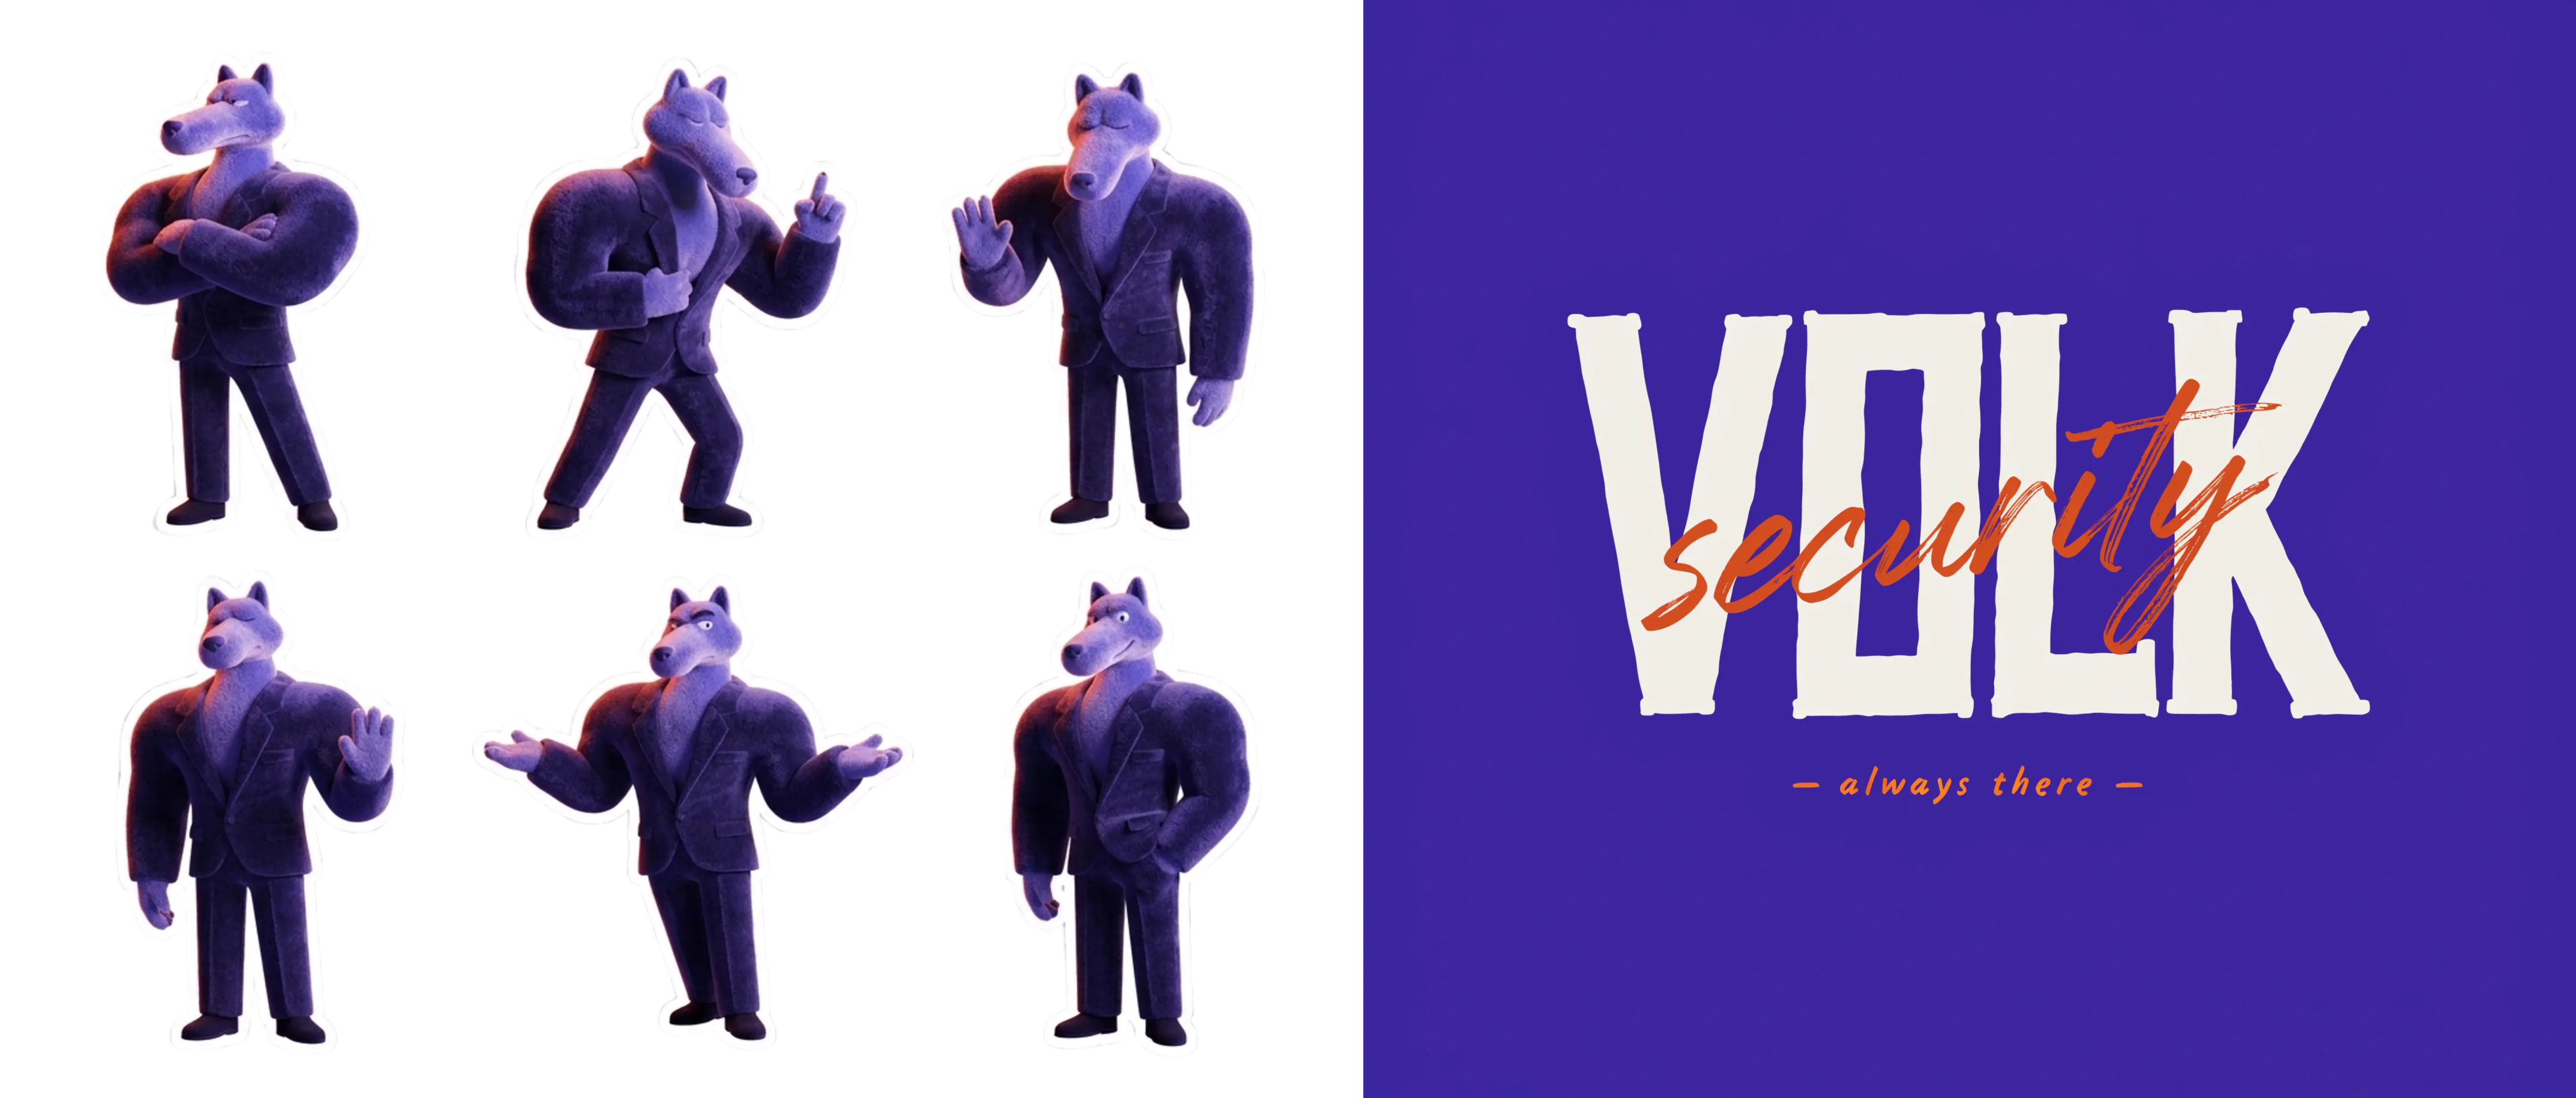
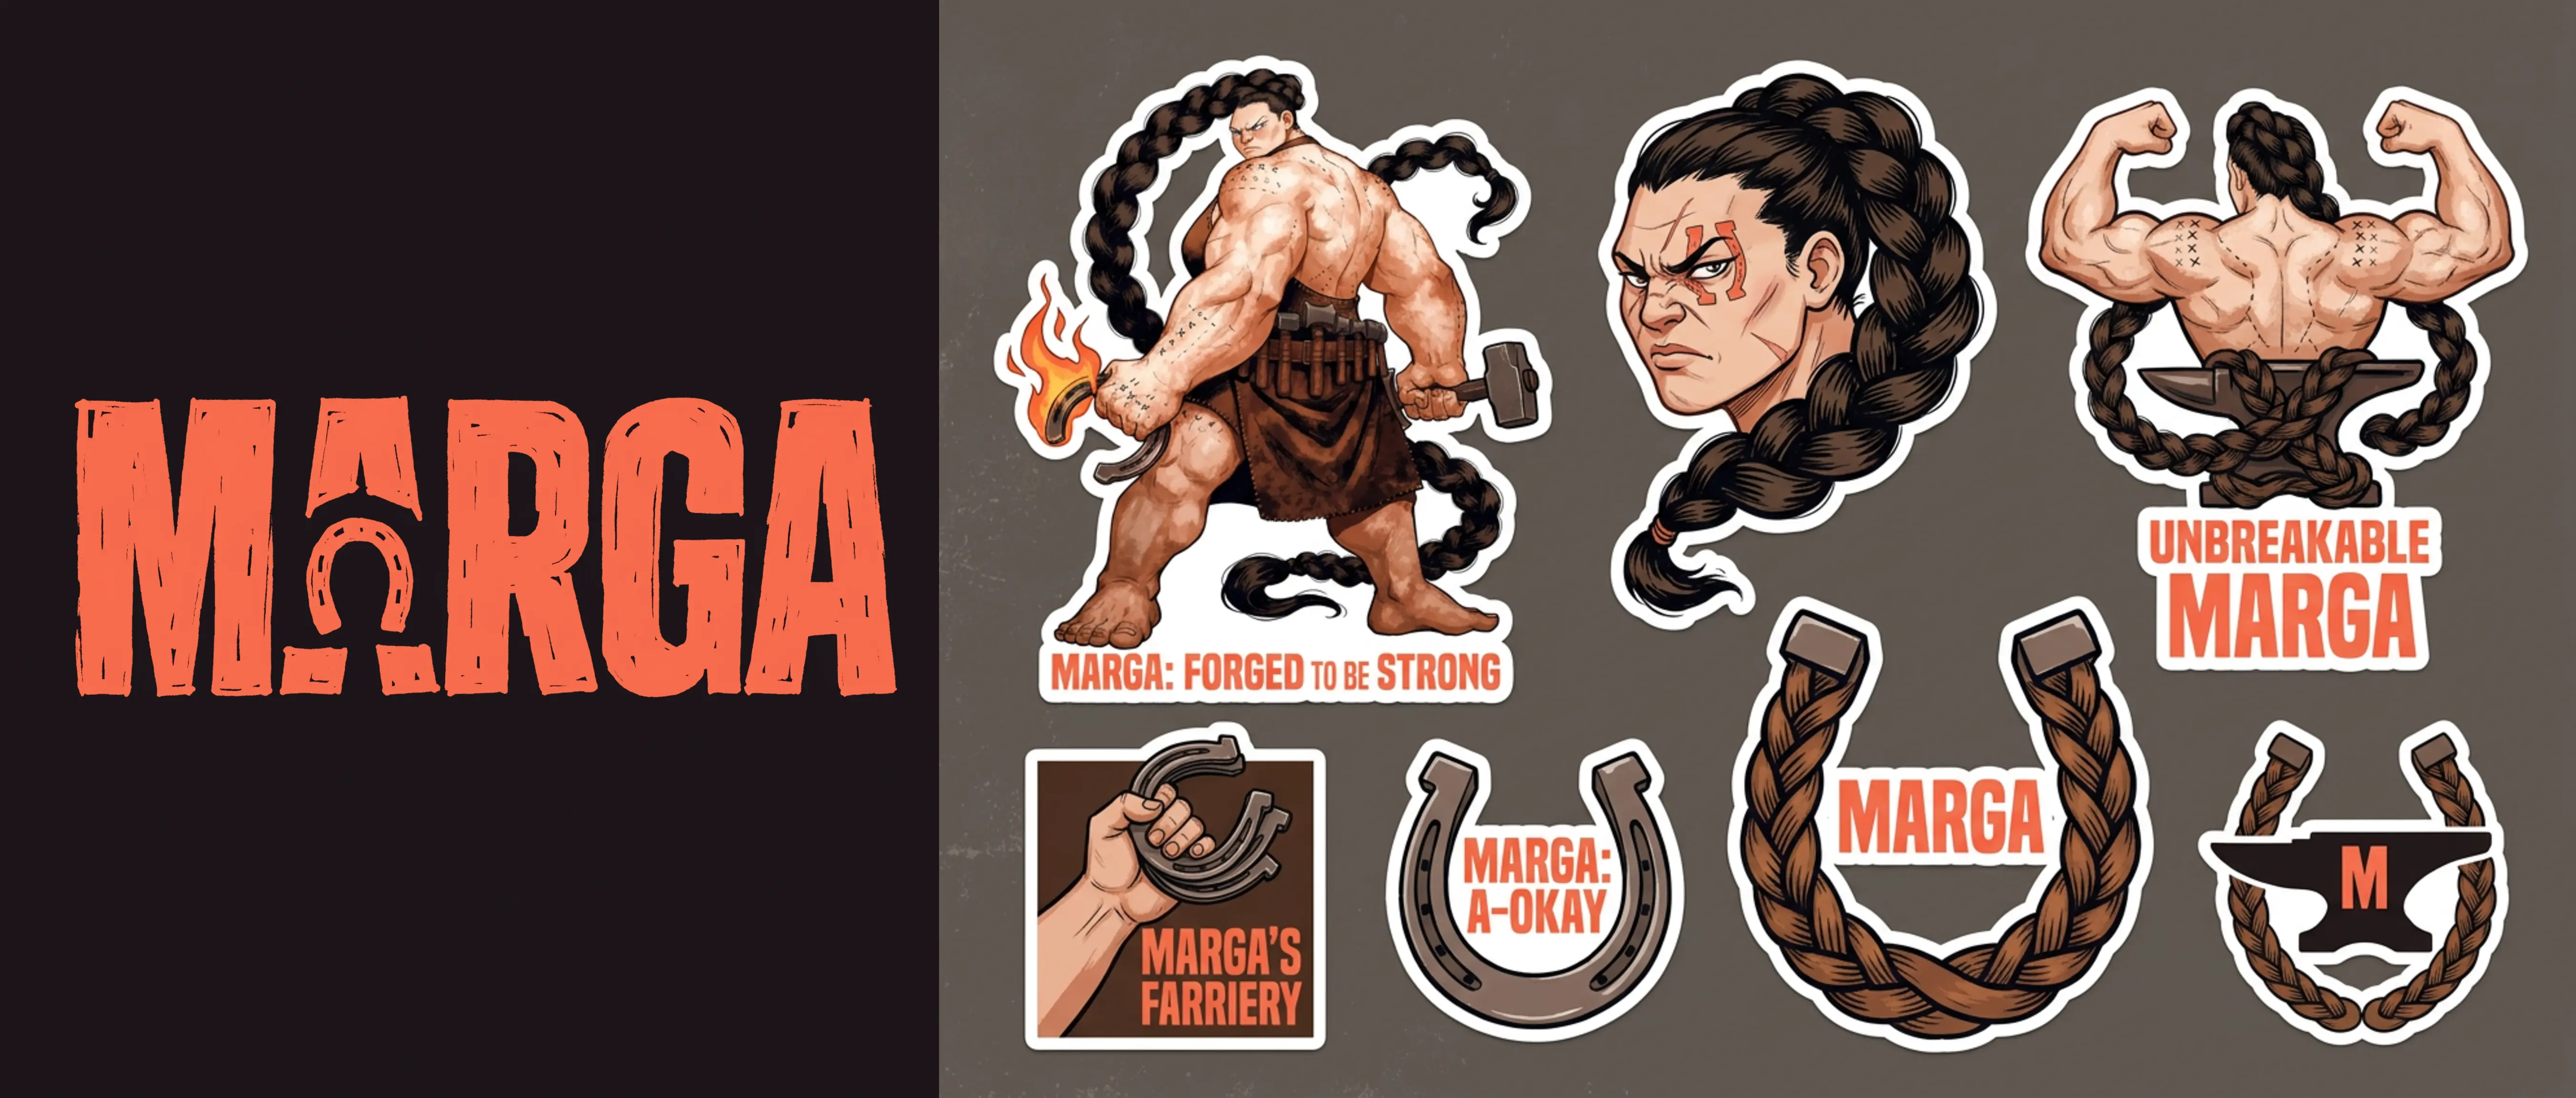
The true test for mascots is format travel: stickers, posters, packaging, social posts, and merch mockup. If the character survives all five without an identity crisis, you built something real.
Recraft V4.1 handles the full range. Posters, sticker packs, social post templates, packaging mockups, editorial illustrations. The model adapts the character to the context that you give it. Your job is to make sure the context was worth adapting to.
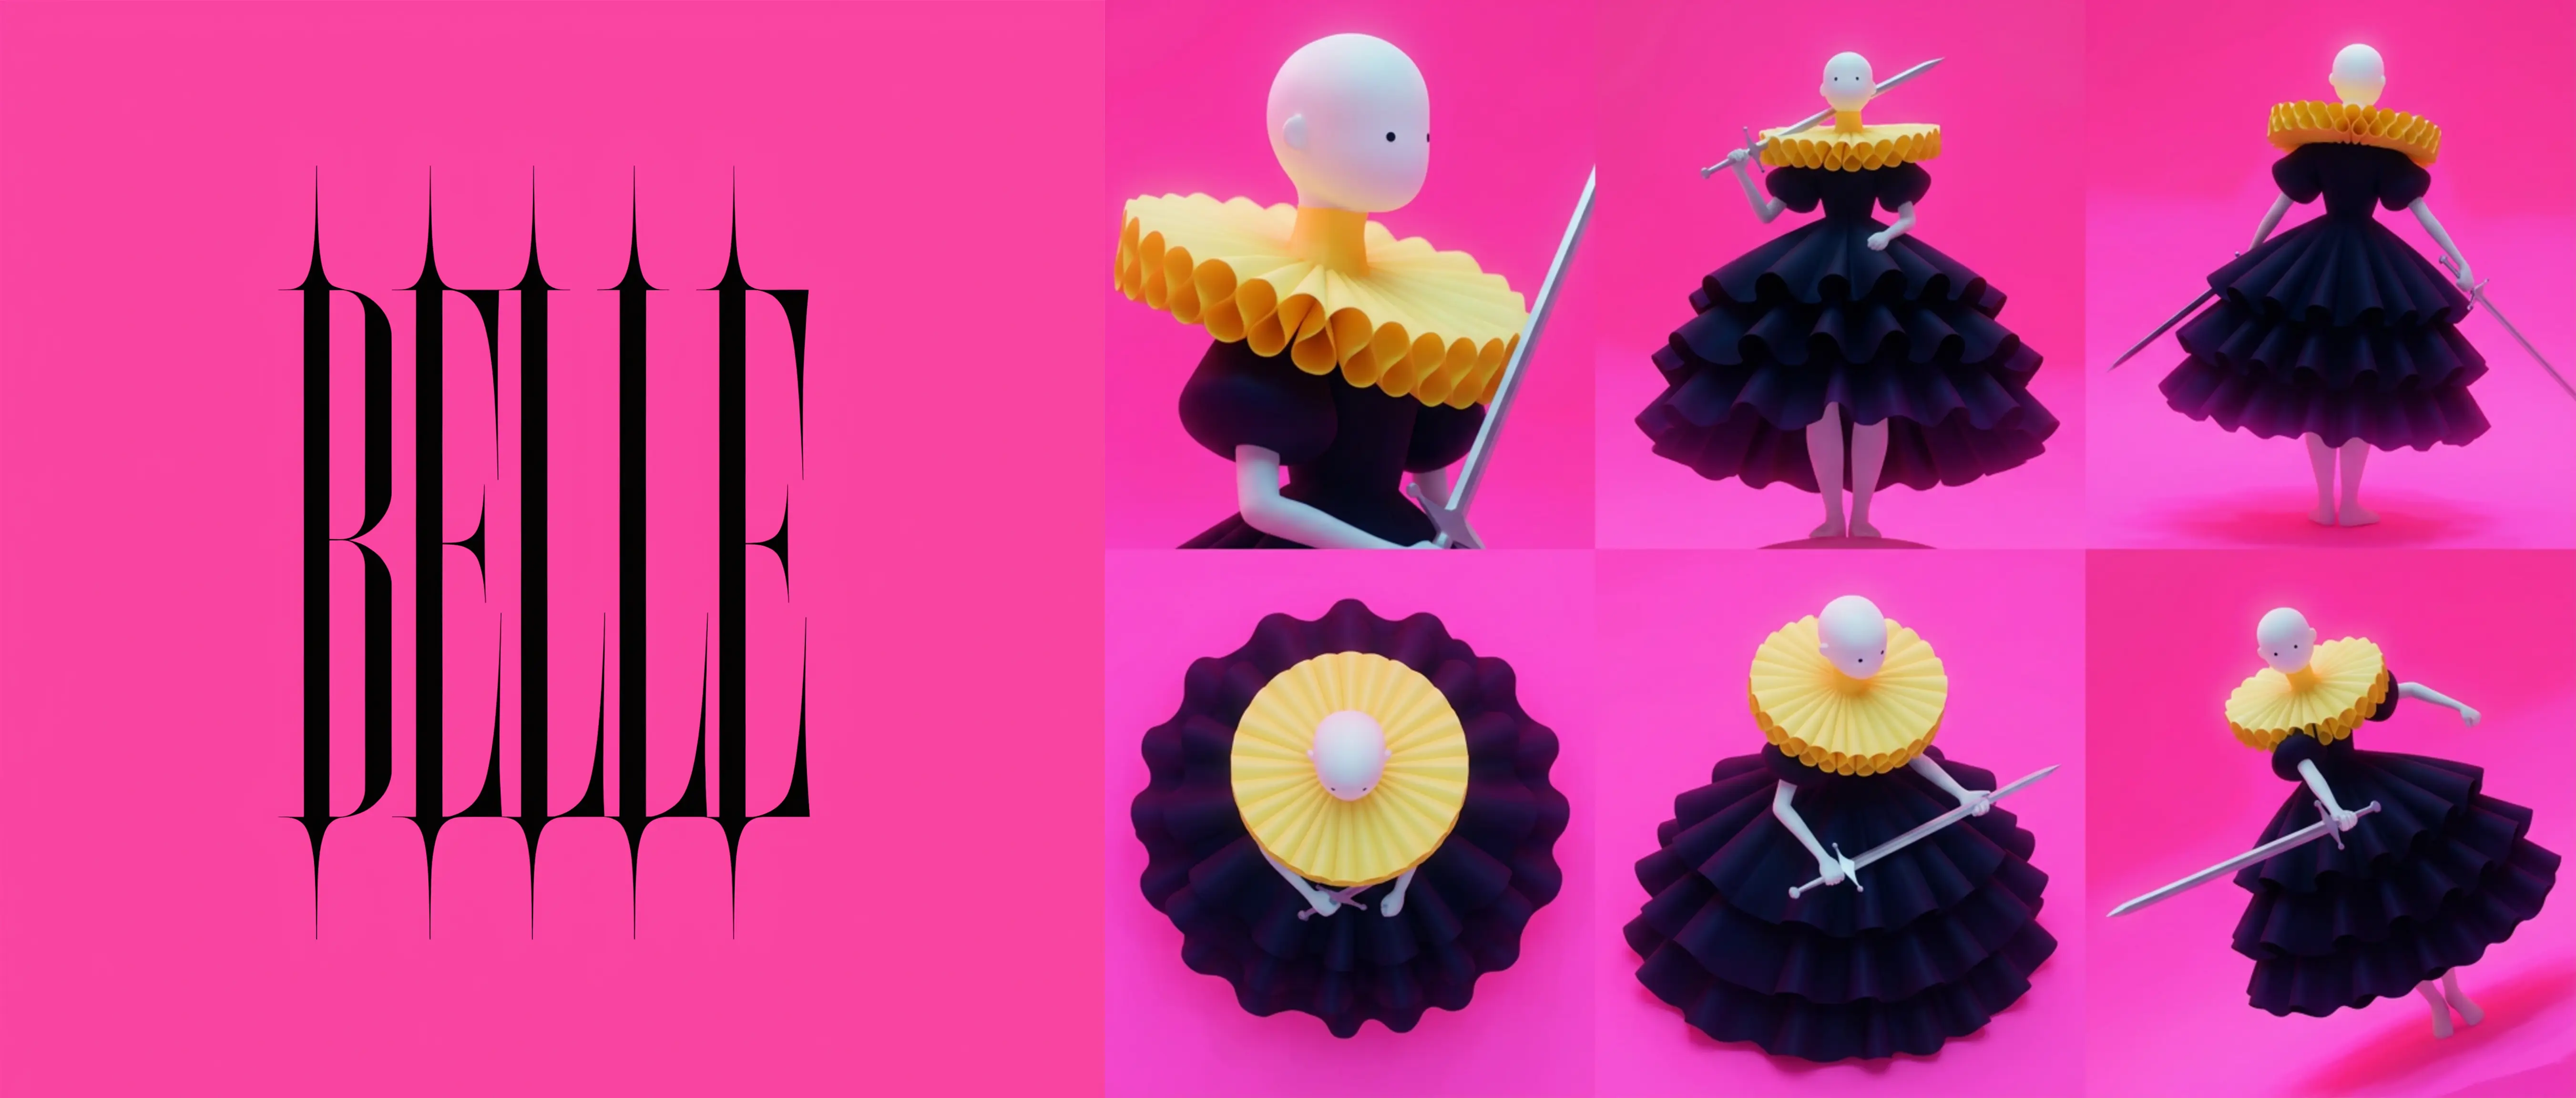
If the character needs to move, image-to-video turns a key frame into a short looping animation. A still of Belle on a hot pink background becomes a three-second loop that belongs on a story, a landing page, or anywhere else that rewards something with a little more life than a JPEG. Not every character needs to move, but once you see yours animated, you will have a very hard time going back to the static version. This is a known side effect and we are not sorry about it.
For anyone iterating across a lot of formats at once, Agentic mode is the faster path. Instead of rebuilding your prompt setup from scratch every time you need a new format, you just describe what you want in plain language and Recraft handles the rest. Need a poster, then a sticker version, then a social crop? Say so. It remembers what you are building and keeps the thread. Think of it as having a very focused creative assistant who never asks what the brand colors are twice.
Step 5: Hold it together
Every step before this one was about building the character. This one is about making sure it does not develop a split personality the moment you ask it to appear on a tote bag.
The reference image workflow is how you keep the character anchored as you move across formats. Feed Recraft the reference sheet from Step 3 as an input, and new generations stay oriented to that visual language: the proportions, the palette, the personality. It is the difference between a character that travels and a character that slowly becomes a different character every three generations, like a game of telephone played entirely in pixels.
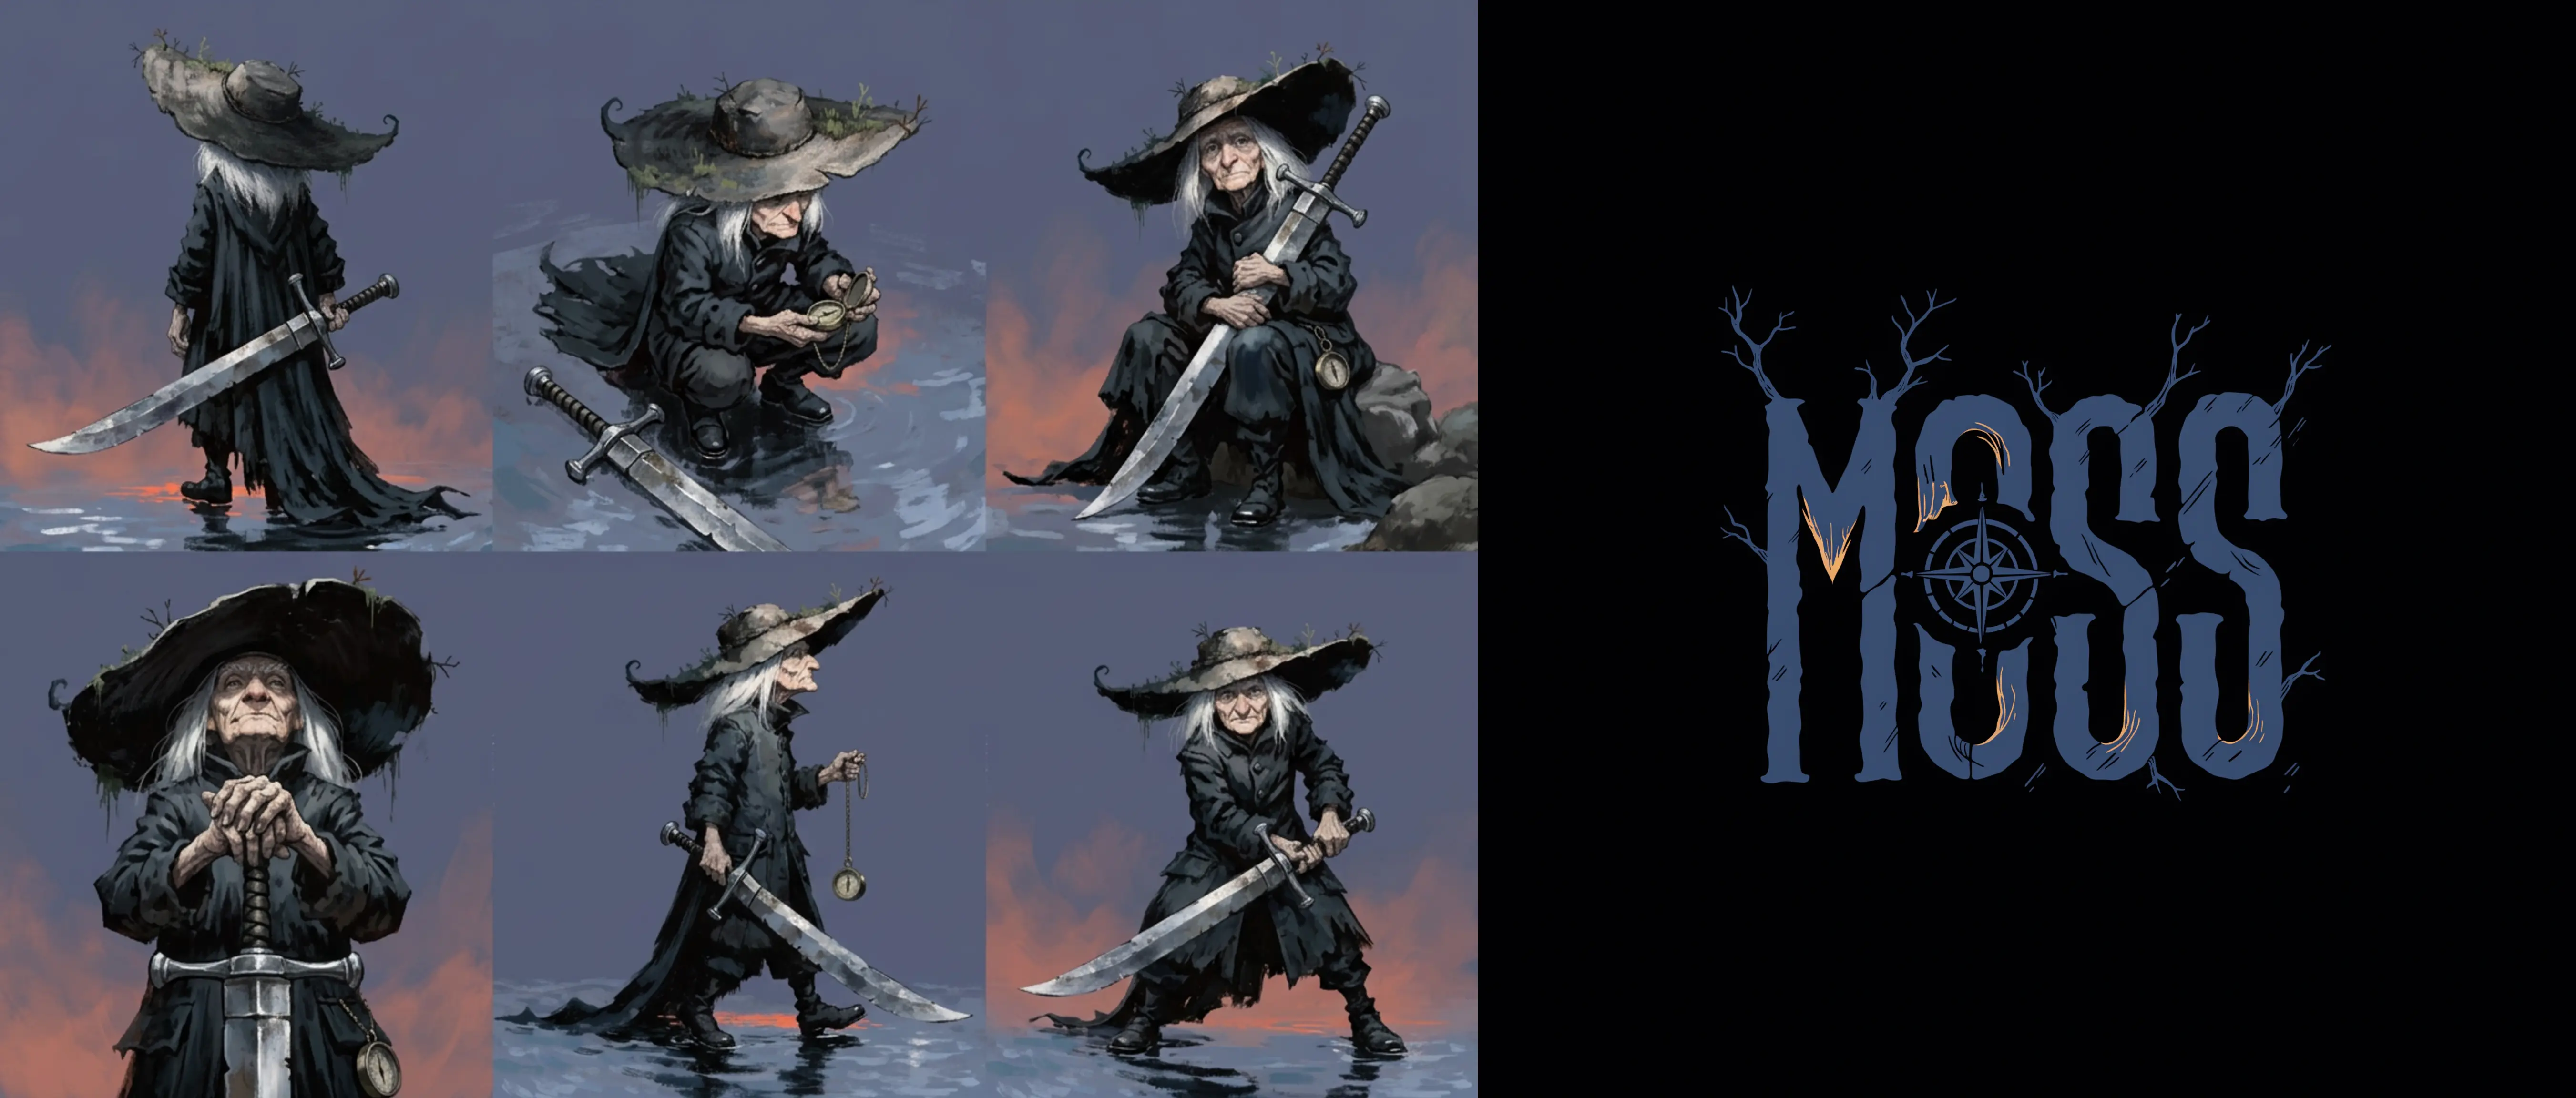
And if you are building something that needs to scale across a team, across a campaign, or across a year's worth of content, custom style training locks the visual language in permanently. Upload the images that define your character's world, and every new generation pulls from that foundation automatically. No briefing the model from scratch every session. No explaining the palette again. Just the character, showing up as itself, every time.
Moss is the proof. A witchy dark warrior with a logotype that belongs to the same world as the character. Every element reads as part of the same decision. That is what this workflow produces when it is working correctly, and it is, frankly, what every brief deserves and most never get.
Now build yours
You have the brief, the workflow, and six characters worth of proof that this is not theoretical. Kai, Volk, Marga, Edgar, Belle, and Moss did not happen by accident. They happened because someone had an opinion about what their character should look like and a tool that was built to execute it.
A good mascot is not a lucky generation. It is a decision, made early, held consistently, and applied everywhere. Recraft Studio is built for exactly that: the kind of creative work where the vision belongs to you and the model's job is to make it look the way it deserves to look.
You have everything you need. The only thing missing is the brief.
.svg)