Put your character to work: write a four-panel script, storyboard it with V4.1 Flash, render on-model panels, and letter the comic.
Character Design in Recraft, Part 6
Consistency is the whole point of a comic. A reader needs to recognize the same person in panel one and panel four, in a different pose, from a different angle, under different light. That is exactly what the first five parts of this series built.
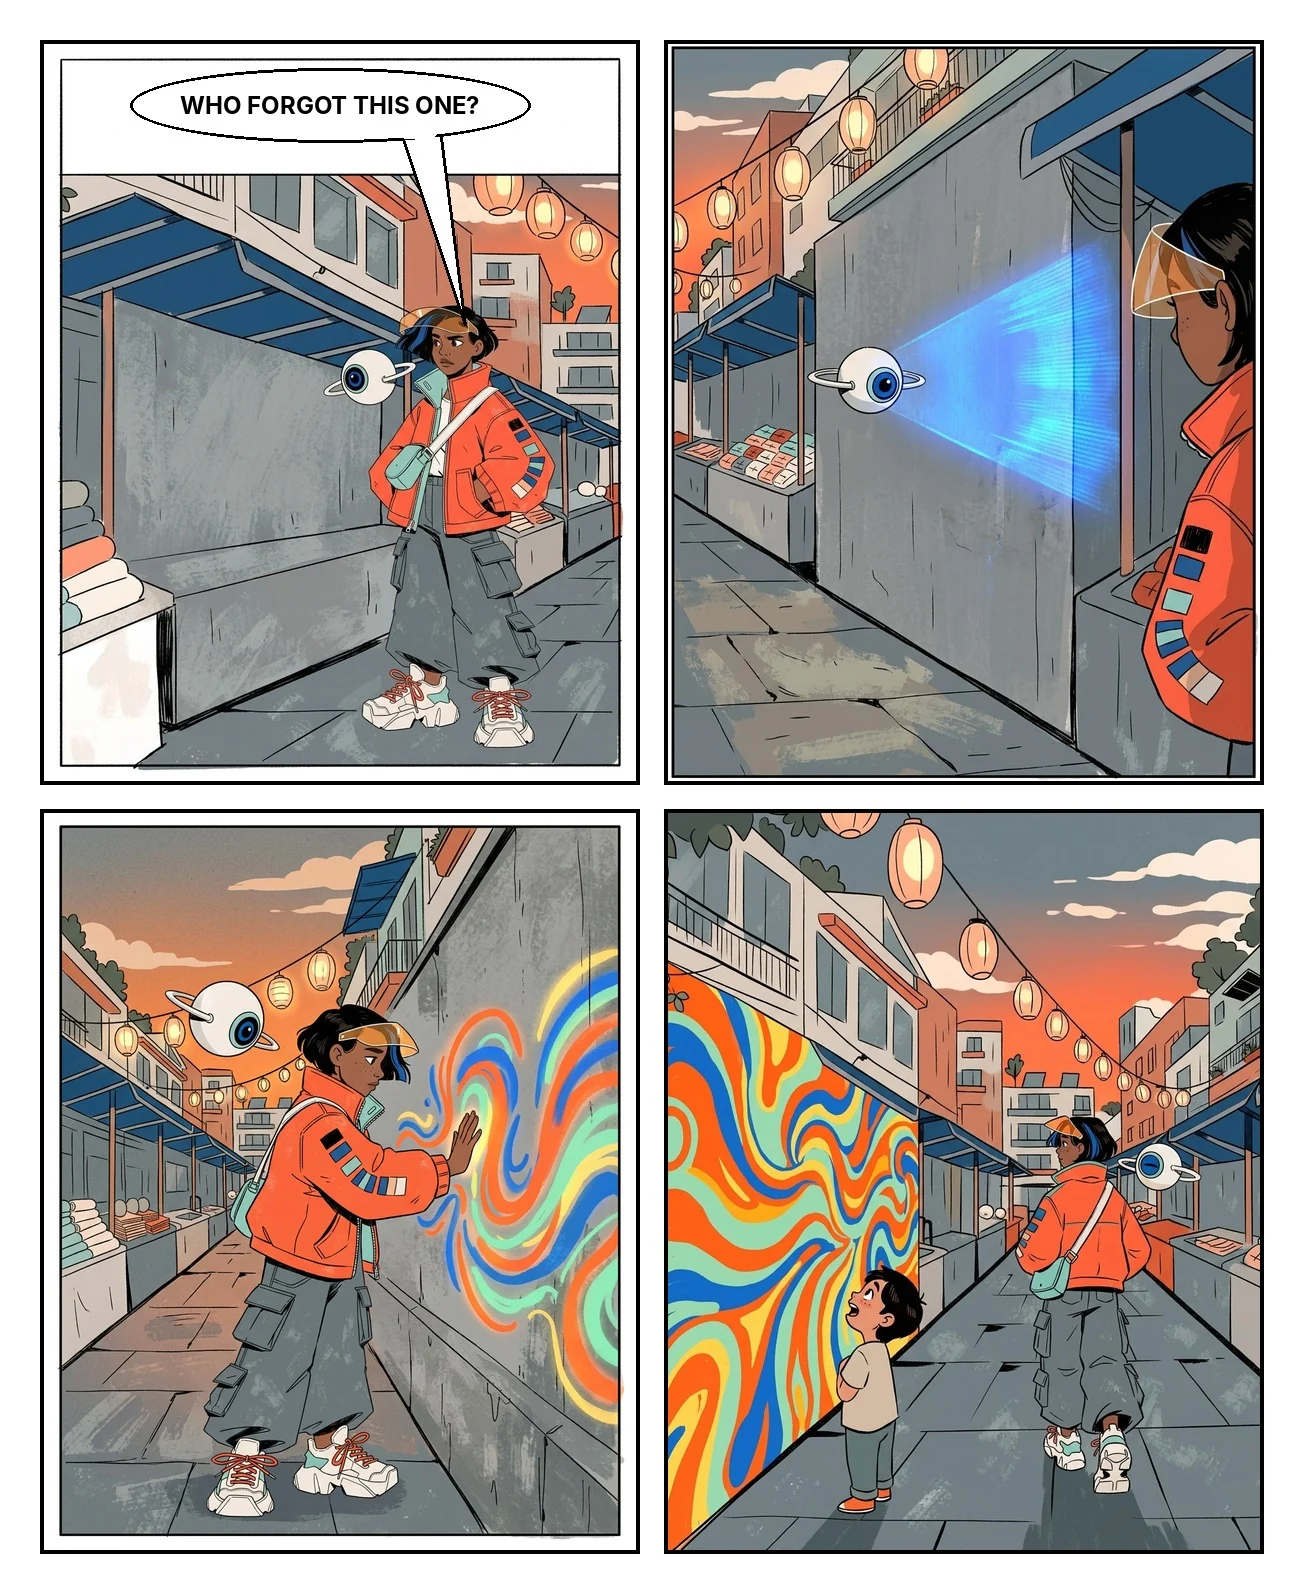
This guide shows how to make a comic with an original character in Recraft Studio: a four-panel script, a quick storyboard, on-model panels, and lettering you can actually read.
How to make a comic: what you need first
Comics expose every weak spot in a character setup. Before you start, gather:
The reference sheet from Part 2: hero, turnaround, and expressions.
The world from Part 4: your custom style and two or three environments.
The cast: the main character plus the mascot from Part 5, if it appears.
What you'll use
Recraft V4.1 Flash (Create → Model, 0.5 credits per image)
Nano Banana 2.1 (Select an image → Edit image, 7 credits per image)
Text tool and Frames (Canvas, no credits)
Credit costs as shown in the model picker at the time of writing.
Step 1: Write a four-panel script
A four-panel comic follows a simple rhythm: setup, development, turn, and payoff. Write one line of action and at most one line of dialogue per panel. Here is ours:
Setup. The scout stops in front of a long gray wall in the market. "Who forgot this one?"
Development. Her drone scans the wall, and a cobalt beam sweeps across it.
Turn. She presses her palm to the wall, and color spreads from her hand.
Payoff. The whole wall is a mural. A passing kid stares; she walks on.
Keep dialogue short. Speech bubbles eat space, and every word you cut leaves more room for the drawing.
Step 2: Storyboard it with V4.1 Flash
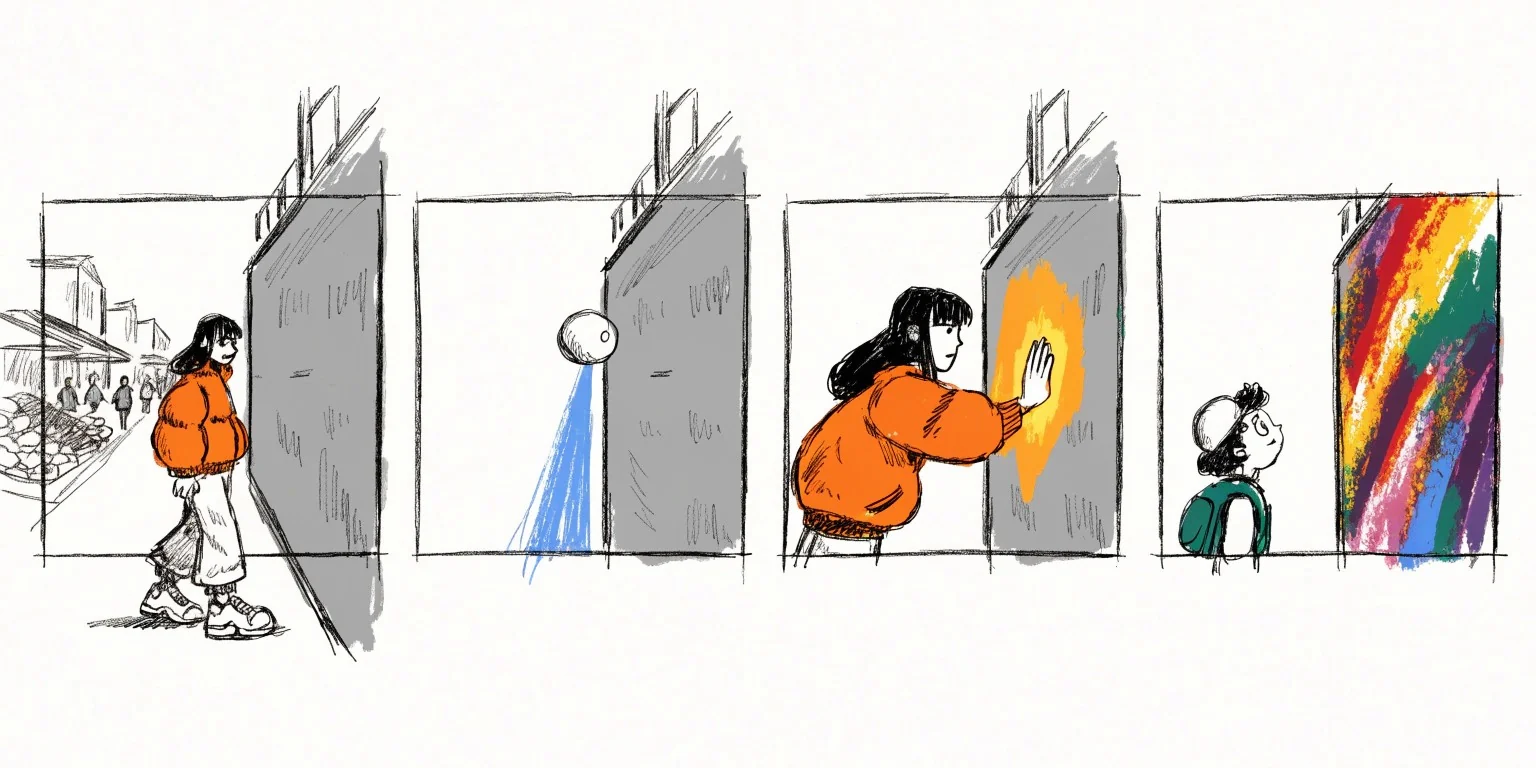
A storyboard is a rough draft of the comic, used to fix composition before you spend credits on final panels. V4.1 Flash is fast and cheap enough to try several layouts.
In Create, choose Recraft V4.1 Flash, set the aspect ratio to 2:1, and raise the image count to ×4.
Rough comic storyboard, four panels in one horizontal row with thin black borders: panel one, a young woman in an oversized orange jacket stops in front of a long gray wall in a market street; panel two, a small floating white sphere drone scans the wall with a blue light beam; panel three, she presses her palm to the wall and color spreads from her hand; panel four, the whole wall is a bright mural and a child stares in surprise. Loose pencil sketch style, simple shapes, clear staging. No text, no speech bubbles.
Pick the layout where each panel reads in one second. Note the camera angle of each panel: wide, medium, close-up.
Step 3: Render each panel on-model
Now render the final panels one at a time. Select the environment for the scene and add the hero as a second reference: the environment is image 1, the hero is image 2. Open Edit image, keep Nano Banana 2.1, set the aspect ratio to 4:5, and generate two variants per panel.
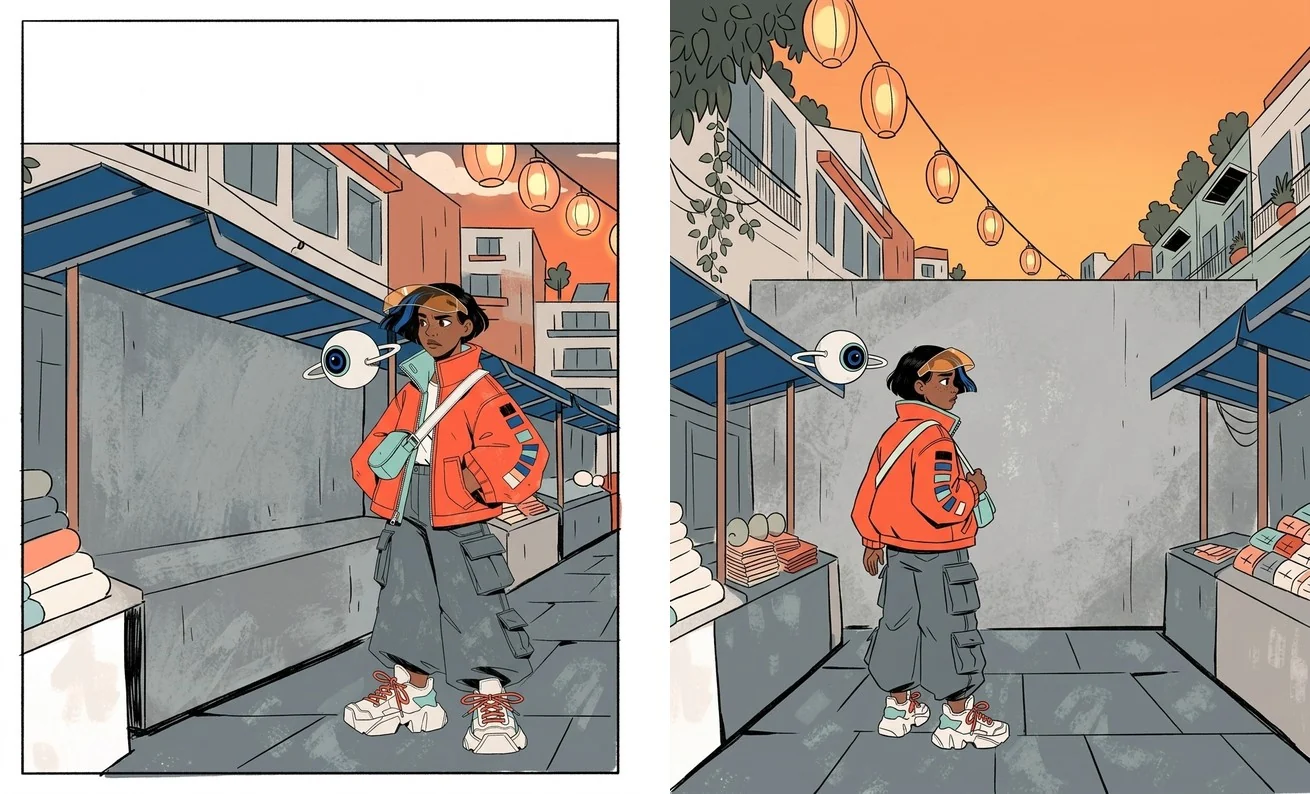
Comic panel. Place the young woman and her floating white drone from image 2 into the street market from image 1. Medium shot: she stops in front of a long blank gray concrete wall between two stalls and looks at it with a curious frown, one hand on the strap of her crossbody bag. The drone hovers beside her head. Keep her face, hair, amber visor, signal-orange jacket with mint lining, crossbody bag, graphite cargo pants and sneakers exactly as in image 2. Keep the market lighting, palette and the same 2D linework, flat cel colors and paper grain as image 1. Leave empty space at the top of the frame for a speech bubble. No text.
For each next panel, keep the same two references and change only the action and the camera: a close-up of the drone scanning the wall, a side shot of her palm on the wall with color spreading, and a wide shot of the finished mural with a kid staring at it.
Pick one variant per panel. Choose for clear staging first and details second: in panel one, the variant with an empty band at the top won, because it left room for the speech bubble.
Step 4: Assemble and letter the comic
Place the four panels in one Frame on the canvas with even gutters between them. Add speech bubbles and dialogue with the text tool, not with the image model. Generated lettering is often misspelled, and you will want to edit dialogue later anyway.
Keep bubbles in the top third of each panel, read left to right. Leave the last panel without dialogue if the image lands the joke.
Step 5: Reuse the comic
One comic gives you several formats:
A social carousel: export each panel as a separate square or 4:5 image.
A vertical story: stack the panels into one tall image.
A webcomic page: combine several four-panel strips with a title panel.
Troubleshooting
The character changes between panels. Always attach the hero as a reference, and add the expression sheet for close-ups.
Backgrounds don't match from panel to panel. Keep the same environment as image 1 for every panel, or use the previous panel as image 1 when the camera barely moves.
Text in the image is garbled. Add "no text" to every prompt and letter the comic with the text tool.
Panels feel static. Vary the camera: wide for the setup, close-up for the turn.
The series so far
You started with one sentence in Part 1 and ended with a character, a reference sheet, three styles, a world, a mascot, and a comic. The same process works for any original character: explore wide, fix the design, then reuse it everywhere.
FAQs
How do you make a comic with AI?
Write a short script, sketch the layout as a storyboard, then render each panel with your character's reference image attached. Add dialogue with a text tool rather than inside the image.
How many panels should a short comic have?
Four is a good start: setup, development, turn, and payoff. It fits one social post or a single strip and forces a clear story.
How do you keep a character consistent across comic panels?
Render every panel from the same two references: the environment and the hero image. Change only the action and the camera in the prompt.
What is a storyboard in comics?
A storyboard is a rough sketch of every panel, used to plan composition and camera angles before drawing the final art.
.svg)