Turn your character's sidekick into a vector mascot with Recraft V4.1 Vector, then build an expression set and a sticker pack.
Character Design in Recraft, Part 5
The best mascot in a story is often not the hero. It is the sidekick: simpler, rounder, and easier to recognize at a glance. Our color scout's companion drone already has the traits good mascot design needs: one strong shape, one signature color, and a face made of a single eye.
This guide turns that drone into a vector mascot with Recraft V4.1 Vector, builds an expression set, and packs it as stickers.
Mascot design starts with a sidekick
A mascot has to work at 16 pixels and on a billboard. Complex characters lose their face, outfit, and details at small sizes. A sidekick built from a sphere, a ring, and an eye loses almost nothing.
Sidekicks also carry less baggage. There is no hairstyle or outfit to drift between images, so the mascot stays consistent with very little effort. If your character has no sidekick yet, the character type sweep in Part 1 is a good place to find one.
What you'll use
Recraft V4.1 Vector (Create → Model, 4 credits per image)
Credit costs as shown in the model picker at the time of writing.
Step 1: Simplify the shape
Describe the companion as a flat, graphic object, not as a 3D prop. Keep only the elements that make it recognizable from the hero image: the off-white sphere, the cobalt eye, and the ring. Add one small accent in the character's main color. For our drone, that is a signal-orange antenna tip, which ties the mascot to the scout's jacket.
Then decide how the mascot moves. With one eye and no mouth, the expression lives in the eye, the ring, and the antenna.
Step 2: Generate the expression sheet as stickers
A mascot without expressions is a logo, so generate the whole set in one image. In Create, choose Recraft V4.1 Vector and set the aspect ratio to 16:9.
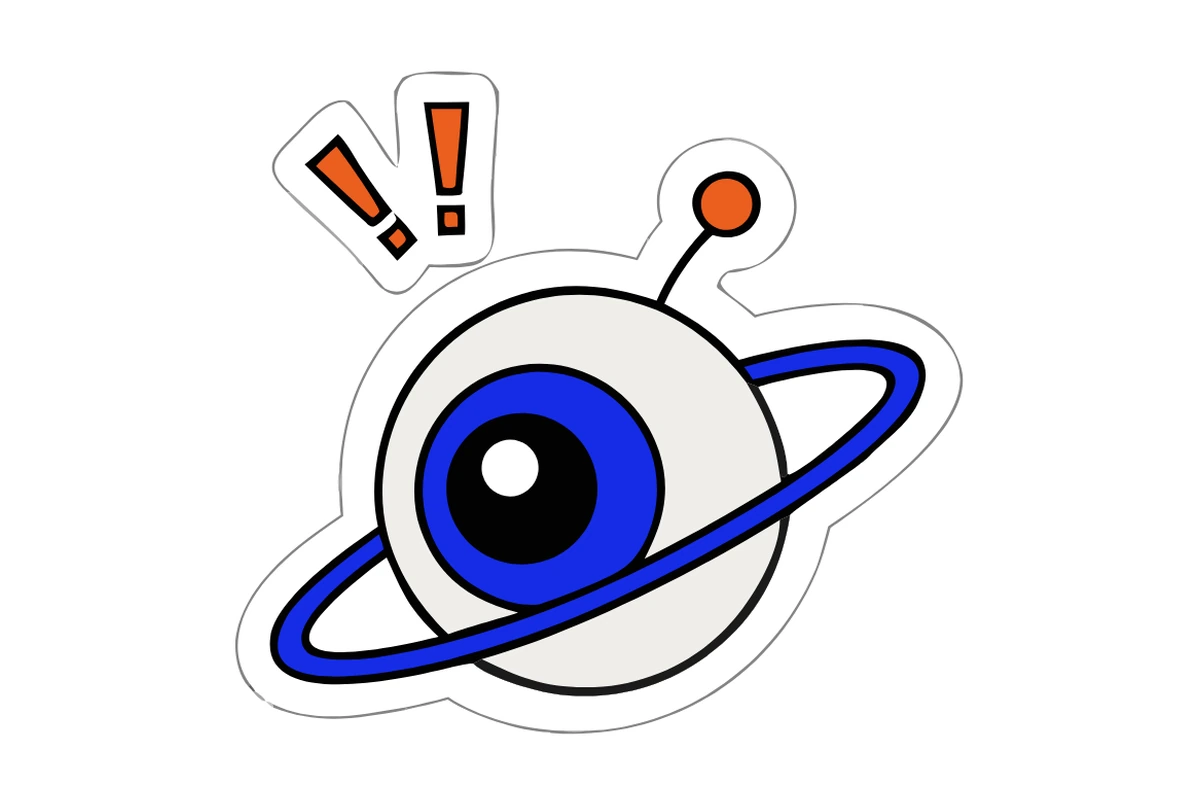
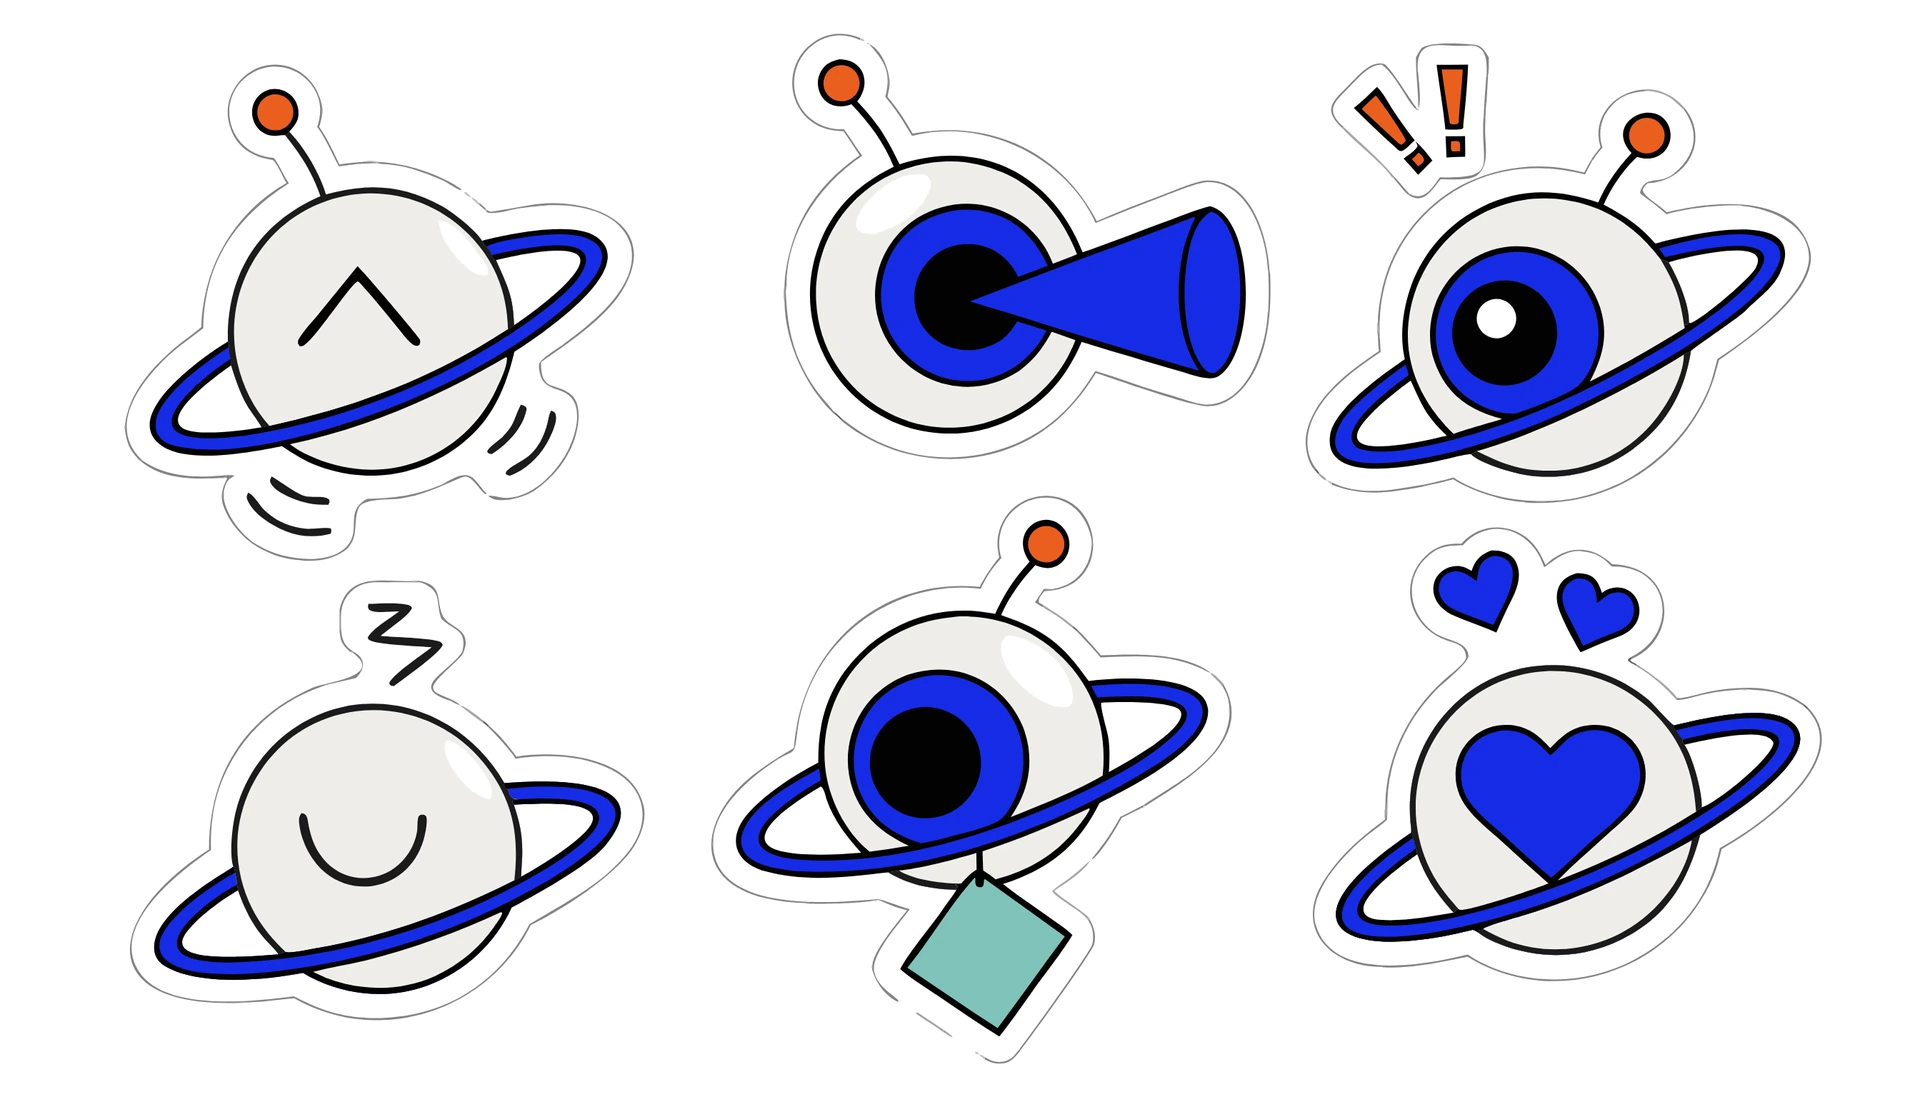
Vector mascot sticker sheet: a small round flying drone character shown six times in a grid of three columns and two rows, identical design in every pose. Design: a matte off-white sphere body, one large cobalt blue camera-lens eye with a white highlight, one thin cobalt ring orbiting the sphere like a planet ring, a tiny signal-orange antenna tip on a thin stem. No mouth: the expression comes only from the eye, the ring and the antenna. Poses, left to right, top to bottom: 1) happy: no iris visible, the eye is drawn as one thick graphite curve shaped like a caret ^, a smiling closed eye, two small motion arcs under the body; 2) scanning: eye wide open, a cobalt cone of light shining to the right from the lens; 3) surprised: eye opened very wide with a tiny pupil, ring tilted steeply, antenna bent backward, two short orange exclamation lines above the head; 4) sleeping: no iris visible, one closed eye drawn as a soft U-shaped graphite curve, a small cobalt Z above the head, ring drooping low; 5) carrying: eye open with the pupil at the bottom of the iris, looking down at a small mint square swatch that hangs below the body from the ring, the swatch does not cover the eye; 6) in love: the iris is a cobalt heart shape, two tiny cobalt hearts floating above the head. Bold rounded silhouette, consistent thick graphite outline, solid flat fills, white sticker border around each pose, poses evenly spaced and not touching. Strict palette: off-white, cobalt blue, signal orange, mint, graphite. Plain light background. No gradients, no words.
Asking for every pose in one image keeps the shapes, outline weight, and palette consistent across the set. The white sticker border in the prompt turns the expression sheet into a sticker sheet in the same step.
Describe each pose by what the eye, the ring, and the antenna physically do, not by the emotion alone. Our first sheet asked for "waving one ring like a hand", and the model twisted the ring into a loop and gave the eye a grumpy lid. Naming exact shapes, such as "the eye is a caret ^" or "the iris is a heart", fixed every pose on the next run.
Step 3: Export clean vectors
V4.1 Vector outputs an SVG, so each pose can be scaled without loss. Split the sheet into separate stickers by selecting each pose and exporting it, or keep the sheet whole for print. If you started from a raster image instead, use Turn into vector under Reuse to convert it.
Check the file before you hand it off: a mascot SVG should have a small number of clean shapes, not hundreds of fragments.
Step 4: Test it small
Put the mascot where it will actually live and look at it at real size:
16 and 32 pixels: a favicon or a chat emoji. The eye and the ring should still read.
64 to 128 pixels: an app icon or an avatar.
Sticker size: about 5 cm in print, with the white border intact.
If a pose fails at 32 pixels, simplify it. Remove the beam or the "z" for the smallest sizes, and keep those details for stickers and illustrations.
Step 5: Write the mascot rules
A one-page rule sheet keeps the mascot consistent when other people use it:
Colors: off-white body, cobalt eye and ring, graphite outline, orange only on the antenna tip.
Shape: the ring always tilts the same way; the eye is the only face feature.
Don'ts: no mouth, no arms, and no realistic rendering in brand materials.
The cast is complete: a hero, a world, and a mascot. Part 6: How to Make a Comic puts them to work in a four-panel comic, a storyboard, and social posts.
FAQs
What makes a good mascot design?
A good mascot reads at any size: one strong silhouette, two or three colors, and a face or feature that carries emotion. It should still be recognizable as a 16-pixel icon.
Should a mascot be vector?
Yes, in most cases. A vector mascot scales from a favicon to a billboard without loss, and its shapes are easy to edit and recolor.
How do you make mascot stickers?
Generate the expression set with a white sticker border around each pose, export it as SVG, and split it into separate stickers. Recraft V4.1 Vector can produce the border in the same prompt.
Can a character's sidekick become a brand mascot?
Often it is the better choice. Sidekicks are simpler than the main character, so they stay consistent and recognizable at small sizes.
.svg)